How to Make a Flyer in PowerPoint: A Step-by-Step Guide
Creating a flyer can be a daunting task, especially if you're not familiar with design software. However, PowerPoint is a versatile tool that can help you create eye-catching flyers with ease. In this article, we will guide you through the process of how to make a flyer in PowerPoint, covering everything from setting the slide size to exporting your final design.
Can I Make a Flyer with PowerPoint?
Absolutely! While PowerPoint is traditionally used for presentations, its array of design features makes it an excellent tool for creating various types of documents, including flyers. Its user-friendly interface and wide range of customization options allow anyone, regardless of their design experience, to create professional-looking flyers. Learning how to design a flyer in PowerPoint is a valuable skill for personal and professional projects.
How Do You Make a Simple Flyer?
Creating a flyer in PowerPoint involves a few key steps. Let’s break it down:
Step 1. Define the Slide Size
Before diving into design, it's crucial to set the correct slide size for your flyer. Typically, a flyer is printed on standard paper sizes. Here’s how you can set the slide size in PowerPoint:
- Open PowerPoint and start a new presentation.
- Go to the "Design" tab.
- Click on "Slide Size" and then "Custom Slide Size."
- Choose the dimensions that match your flyer requirements (e.g., 8.5 x 11 inches for a standard flyer).
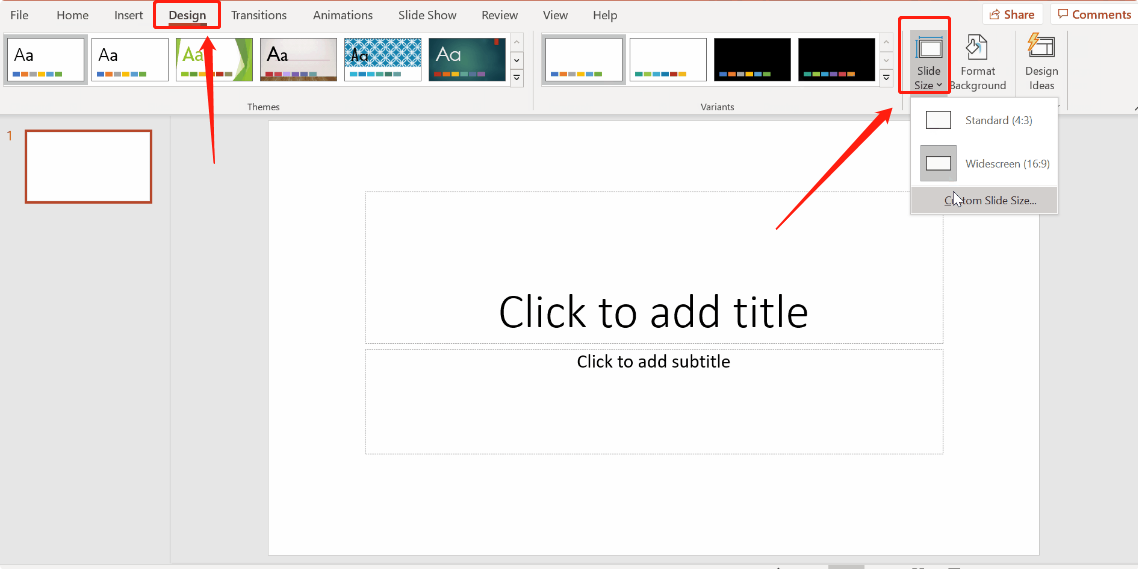
Please ensure you set the size before starting your design to avoid having to resize and rearrange elements later. Standard sizes like 8.5 x 11 inches or A4 are commonly used for flyers.
Step 2. Choose the Flyer Style
The style of your flyer sets the tone for your message. Consider the purpose of your flyer and your target audience. PowerPoint offers various themes and templates that you can customize:
- Browse through the templates in the "Design" tab.
- Select a template that fits the theme of your flyer.
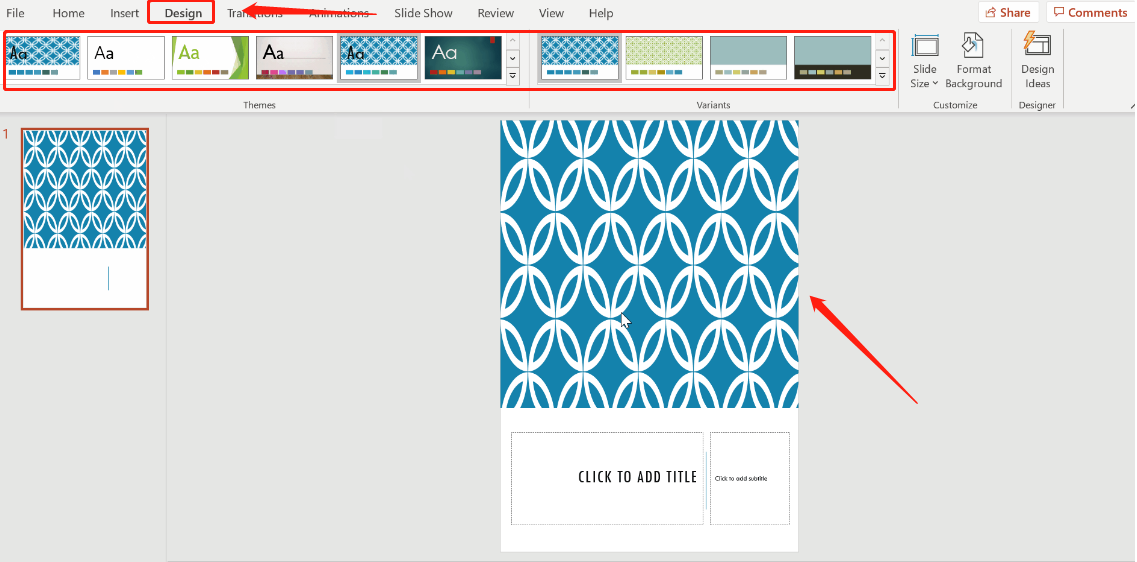
Customize the colors, fonts, and backgrounds to match your brand or message. Understanding how to create a flyer in PowerPoint will allow you to make informed design choices.
By the way, choose a clean and simple design if your flyer contains a lot of information. Maintain consistency in fonts and colors to ensure your flyer looks professional.
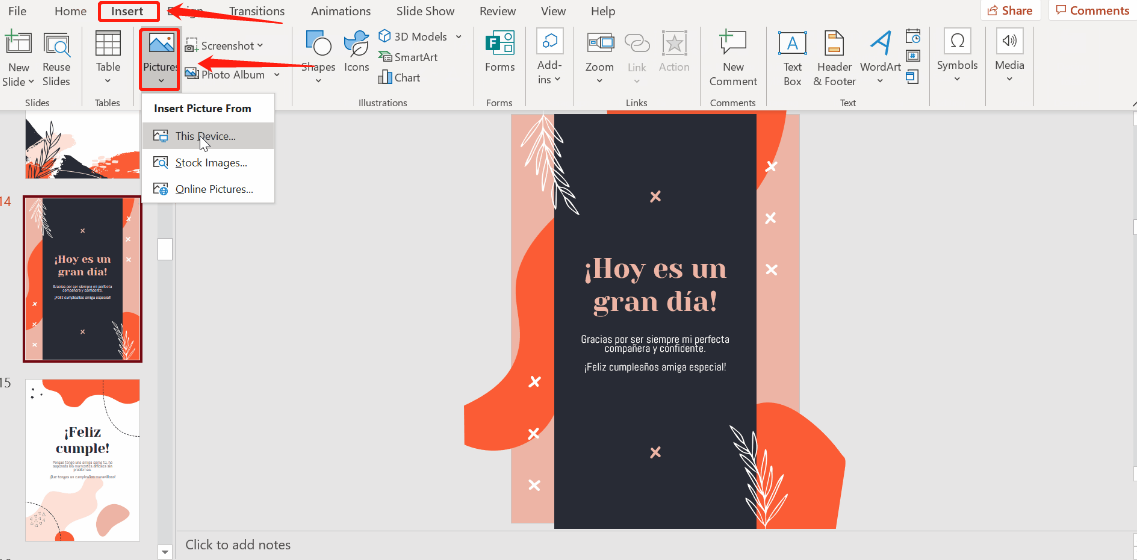
Step 3. Add Images and Text in PowerPoint
Images and text are the core elements of any flyer. Here’s how you can effectively add and arrange these elements:
Adding Images:
- Go to the "Insert" tab.
- Click on "Pictures" to add images from your computer, or "Online Pictures" to find images from the web.
- Resize and position the images to enhance your design.
Adding Text:
- Use text boxes to add headlines, descriptions, and other information.
- Choose readable fonts and appropriate font sizes.
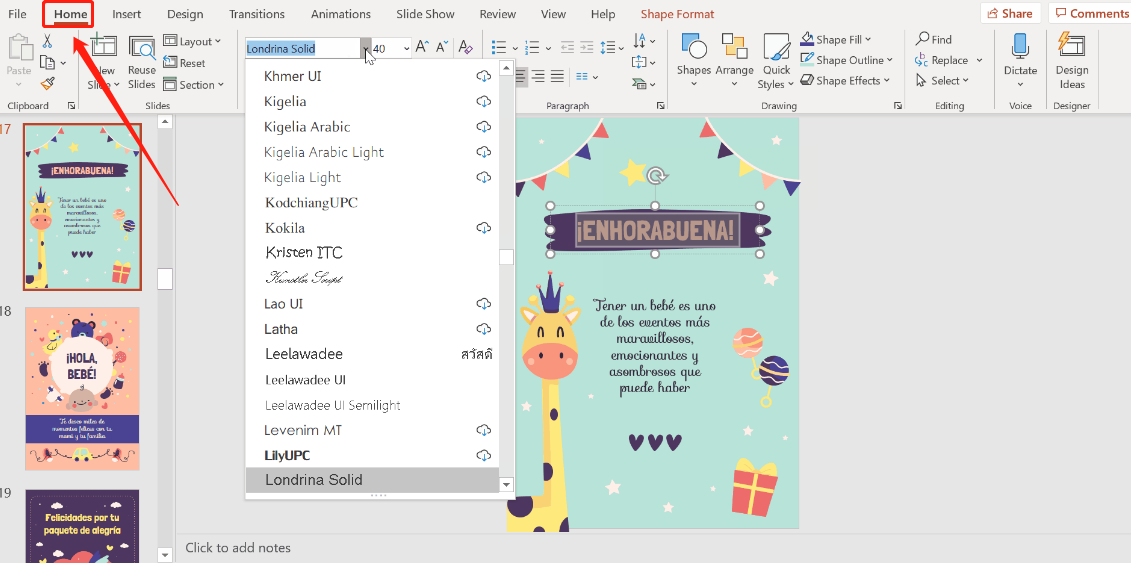
Highlight important information with bold or colored text. This is an essential part of making a flyer in PowerPoint.
For high-quality prints, ensure your images have a resolution of at least 150 ppi to prevent pixelation. To verify an image’s resolution, right-click on the image, choose "Properties," and go to the "Details" tab. Here, you’ll see the vertical and horizontal resolution.

If you have multiple slides in your PowerPoint file but only want to save the flyer slide, click on "Options" before hitting "Publish." In the "Range" section, select the specific slide you need. This way, only the chosen slide will be saved as a PDF.
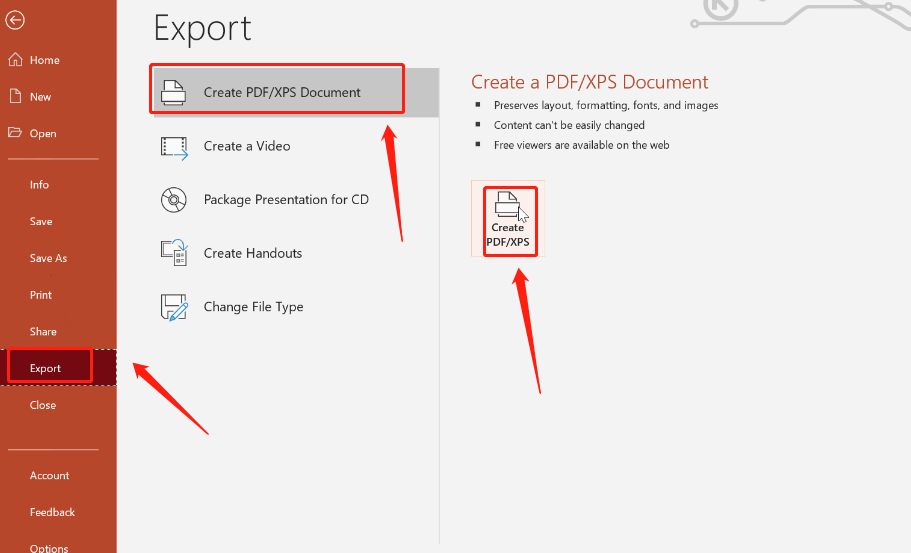
Step 4. Export Your PowerPoint Flyer to PDF
Once you are satisfied with your design, you’ll need to export it as a PDF for printing or sharing. Follow these steps:
- Click on "File" in the top menu.
- Select "Export" and then "Create PDF/XPS Document."
- Choose the location where you want to save the file.
- Click "Publish" to save your flyer as a PDF.
Tips: What Size Is a Flyer in PowerPoint?
The size of your flyer will depend on your specific needs. Common flyer sizes include:
- 8.5 x 11 inches: Standard letter size, perfect for most general flyers.
- 5.5 x 8.5 inches: Half-letter size, ideal for handouts or smaller flyers.
- A4 (8.27 x 11.69 inches): Commonly used internationally.
Always ensure that your slide size matches the size of the paper you plan to print on to avoid any formatting issues.
Conclusion
Understanding how to make a flyer in PowerPoint is a straightforward process that anyone can master. By following the steps outlined above, you can produce professional and visually appealing flyers for any occasion.
Sometimes you might need to create an engaging presentation quickly and effortlessly. In that case, you might want to check out Tenorshare free presentation maker. It allows you to create professional presentations just by entering your topic—saving you time and providing you with polished, ready-to-use slides in minutes.
Tenorshare AI Slides
- One-click AI presentation maker for stunning slides in minutes.
- Powerful AI ensures professional outlines and content.
- Beautiful, well-designed templates at your fingertips.
- Perfect for businesses, educators, students, and personal projects.
- Free access for every user.
You Might Also Like
- How to Convert PDF to PPT with AI
- Top 4 Free Online AI PDF to PPT Converters You Should Try
- Top Best Video to PPT Converter AI (2026 Newest)
- 12 Best AI For PowerPoint Presentations Free 2026
- How To Use Chatgpt To Generate Powerpoint For Free Easily?
- AI Text-to-PowerPoint: Craft Stunning Slides in Minutes!

Tenorshare AI Slides – Create Slides in Seconds
Professional, customizable and free template available.Tenorshare AI Slides, Make PPT Instantly
Generate slides in one click.
Tenorshare AI Slides – Create Slides in Seconds